Emails
Set the sender and branding every email shares, and write your invitation email.
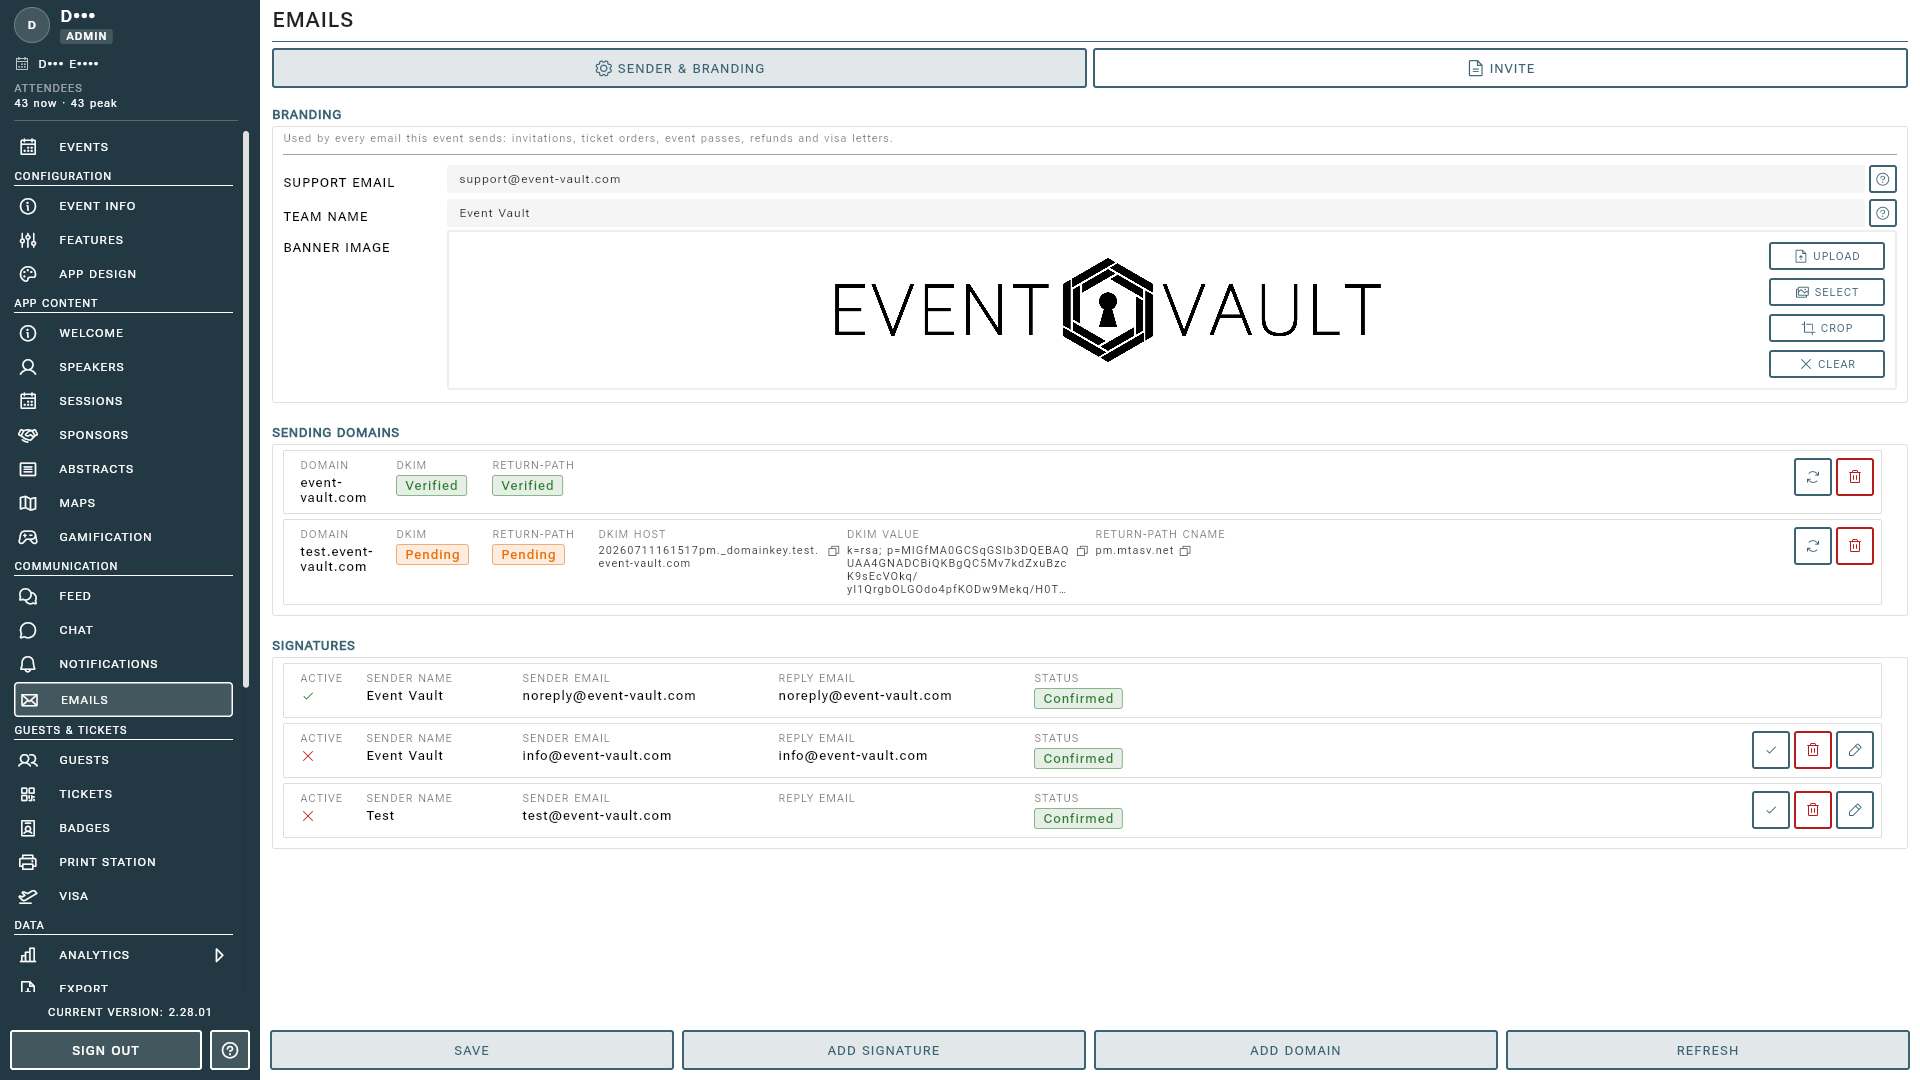
Every email your event sends, from the invitation to the e-ticket and the visa letter, goes out under the same sender and with the same branding. You set both on the Emails page, together with your invitation email. Access it by selecting Emails from the sidebar under the Communication section. The page has two tabs: SENDER & BRANDING and INVITE.
Sender & Branding
What you set here is used by every email this event sends: invitations, ticket orders, e-tickets, refunds and visa letters.
Branding
- Support Email: the address guests can reach you at, shown in the email footer.
- Team Name: who the email is signed by, for example “The Acme Conference Team”.
- Banner Image: a branded banner at the top of every email. Use a wide, high-resolution image that clearly identifies your event.
Signatures A signature is an address your emails can be sent from, with the name shown in attendees’ inboxes and an optional reply-to address. Add one with ADD SIGNATURE: we send a confirmation email to that address, and the signature can be used once it has been confirmed. Use Set Active Signature to choose which one this event sends from. Every event can always send from the default Event Vault address.
Sending Domains Add your own domain with ADD SENDING DOMAIN and add the DKIM and Return-Path records it shows to your domain’s DNS. A verified domain improves deliverability, since your emails are then signed by your own domain.
Invitation
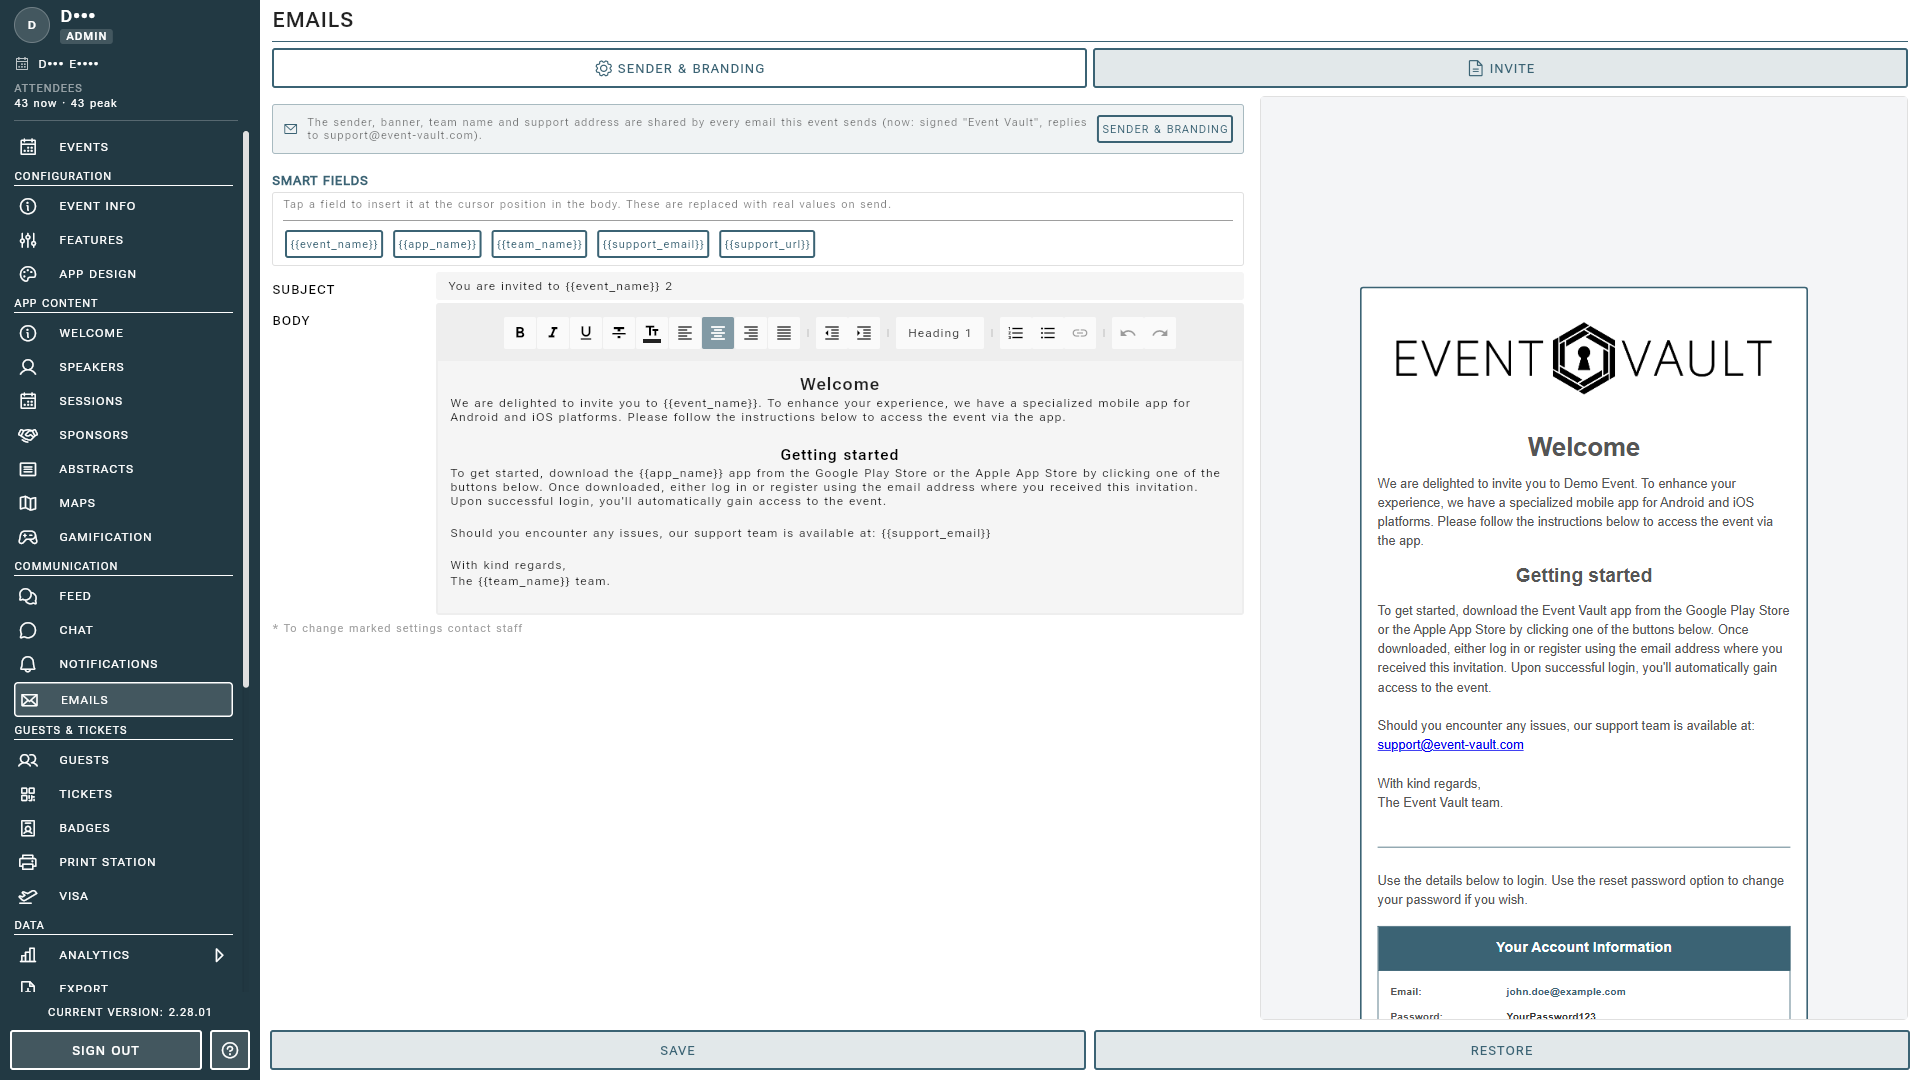
The INVITE tab is the email you send your guests from the guest list. Write the Subject and the Body in the editor, and see the result in the preview beside it.
Smart Fields fill in each guest’s own details: click a field to insert it at the cursor, and it is replaced with the real value when the email is sent, for example the guest’s name.
Sales Emails
The emails your ticket shop sends are under Sales Emails in the Sales section of the sidebar: the ORDER CONFIRMATION with its invoice, the EVENT PASS with the attendee’s e-ticket, and the REFUND notification. They are sent automatically and their text cannot be changed, but they carry your sender and branding from this page. Each tab shows a preview, and where the email differs for a business buyer you can switch between Consumer and Business.
Visa Letter Email
The email that delivers a visa invitation letter is the EMAIL tab of the Visa page, beside the letter itself.
Tips
- Set up your own sending domain early: DNS changes can take a while, and a verified domain keeps your invitations out of spam folders.
- Keep the invitation concise. Guests should be able to scan it quickly and find the key action: install the app and sign in.
- Use a high-quality banner image that matches your event branding for a professional first impression.
- Update the invitation and send reminders as your event approaches with new information, such as schedule updates or venue details.